
How to Add a Vertical Line in Squarespace (The Easy Way)
Many layouts on Squarespace would benefit from the addition of a vertical line—whether it’s for separating out columns or just as a decorative element. However, Squarespace does not have a built-in option for vertical lines, despite having a horizontal line block and a vast amount of shape blocks to choose from.
Many methods suggest adding a code block, but I prefer to add a vertical line in Squarespace by utilising the shape block. With a bit of custom CSS, you can modify an existing shape (I use the keystone option) and turn it into a vertical line.
Why use this method?
There’s no need for code blocks—everything is done within the normal Squarespace editor
Changing the size of the line is easy as it behaves like a regular block on Fluid Engine
It can be moved, resized and hidden behind other blocks on mobile if needed
It is responsive, scalable and does not pixelate, unlike an image of a line
Add a Keystone Shape Block
To add a vertical line in Squarespace, start by navigating to the page where you want it to appear. You’ll then need to add a shape block set as a keystone.
In the Home Menu, click Website > Pages.
Click on the relevant page and click Edit.
Click Add Block and select Shape.
Click the Shape and select the Pencil Icon.
In the dropdown, select the Keystone, the final option.
If your website is live, you may want to add the shape block to a hidden page first.
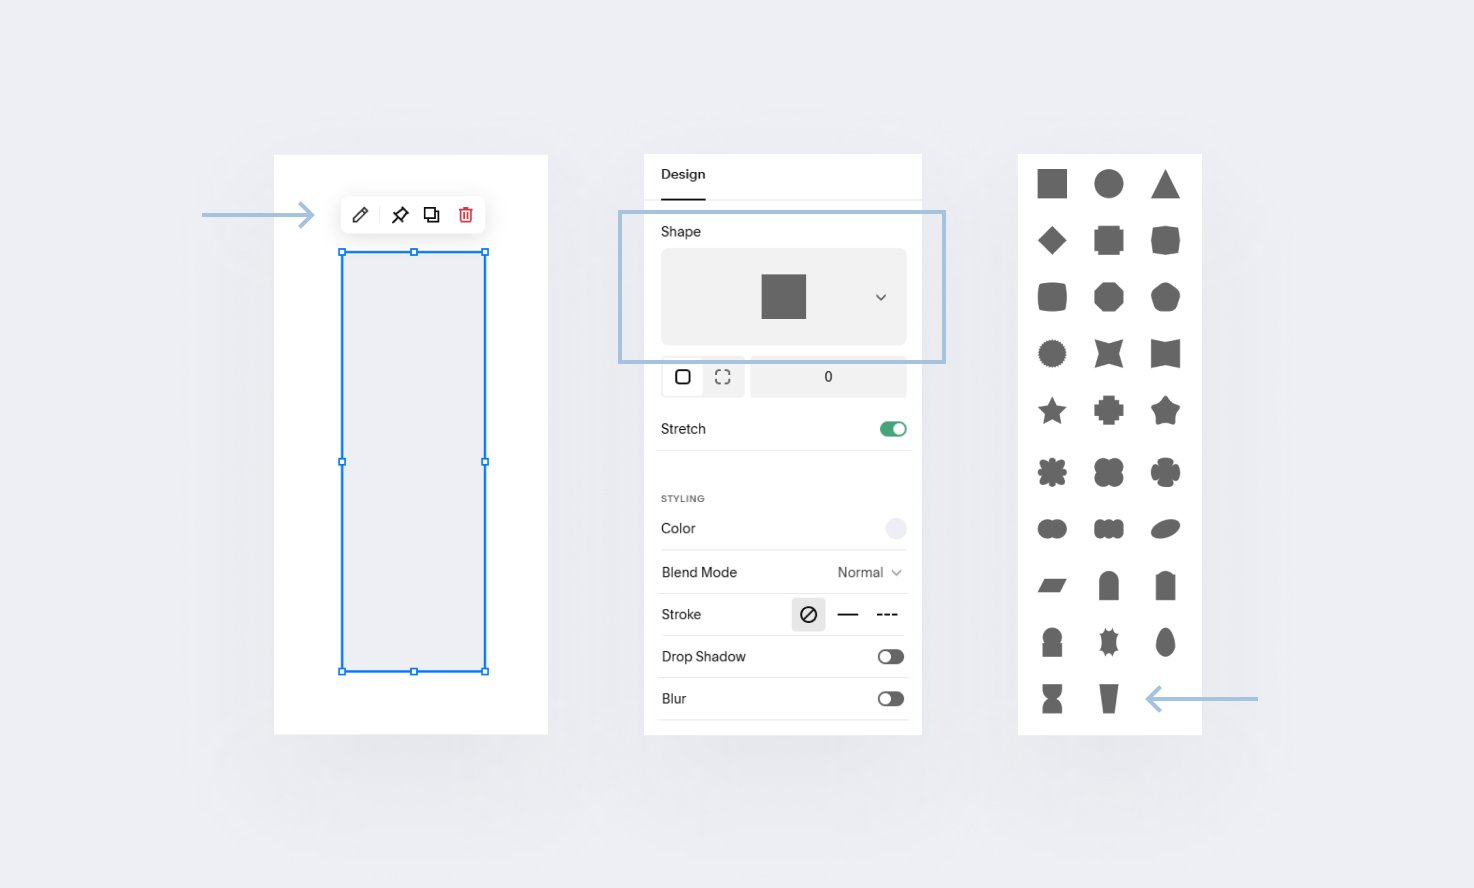
The Squarespace Shape Block editor showing example shape options
Convert the Shape into a Vertical Line with Custom CSS
Next, we’ll need to modify the dimensions of the keystone so that it becomes a vertical line. This requires a few lines of custom CSS.
In the Home Menu, click Website and scroll down to the bottom.
Click Website Tools > Custom CSS.
Copy and paste the following CSS into the box.
To change the thickness of the line, adjust both instances of 1px.
.sqs-shape-block-container[data-shape-name="keystone"]{
  &::before {
    position: absolute;
    content: '';
    height: 100%;
    width: 1px;
    background-color: var(--shape-block-stroke-color);
  }

  .sqs-shape > * {
    stroke-width: 0 !important;
  }

  svg {
    display: none !important;
  }
}

@media screen and (max-width: 768px) {
  .sqs-shape-block-container[data-shape-name="keystone"]::before {
    width: 100%;
    height: 1px;
  }
}

Where to paste Custom CSS to add a vertical line in Squarespace
Customise the Style of the Vertical Line
Now you have been able to add a vertical line in Squarespace, you may want to tweak the appearance to better suit your website.
In the Home Menu, click Website > Pages.
Click on the relevant page and click Edit.
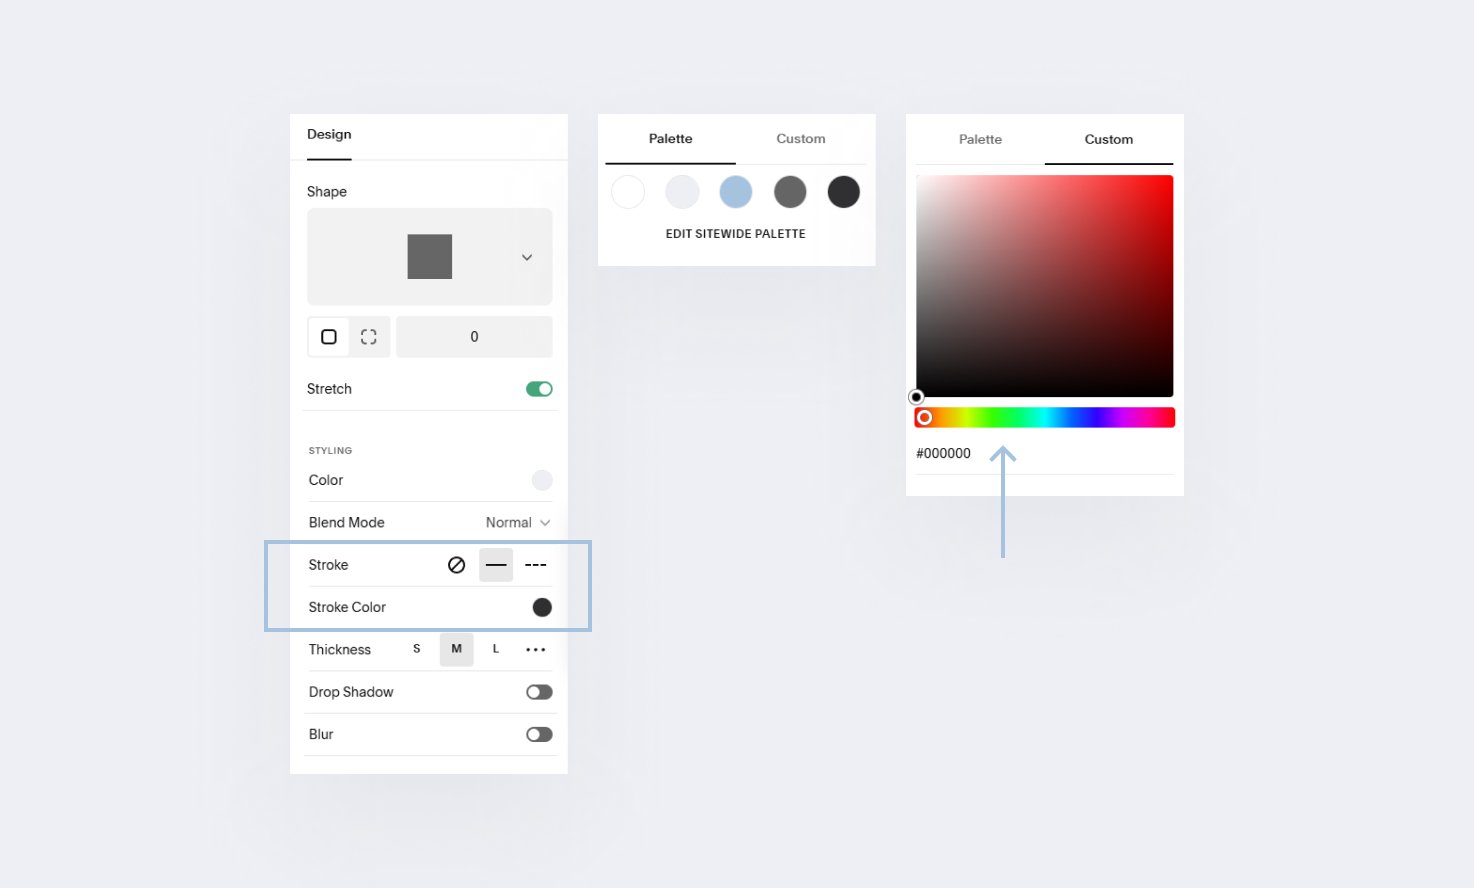
Click the Shape Block and select the Pencil Icon.
Select Solid Stroke.
To change the color, select Stroke Color.
The Squarespace Shape Block editor showing example styling options
Troubleshooting the Vertical Line
Sometimes things don’t work and it can be difficult to understand why. If you’re following the instructions to add a vertical line in Squarespace and it doesn’t work, there could be a few reasons.
Why does my shape disappear?
The custom CSS has been pasted or edited incorrectly. Try copying the original custom CSS without making any changes.
Why won’t the color change?
You cannot use the Color option to change the color of the line, you must use the Stroke Color. The Stroke Style (solid or dashed) must be selected before you can adjust the Stroke Color.
Why can’t I change the thickness?
You cannot use the Thickness option to change the thickness of the line, you must edit the custom CSS. Look for the two instances of 1px, and increase the number on both to increase the thickness.